#
Adding a template
All of your messages are looking plain with the default message template?
This is because we automatically convert legacy messages to work with the default template.
- Here you'll learn how to create and implement your custom fancy messages 🖌️
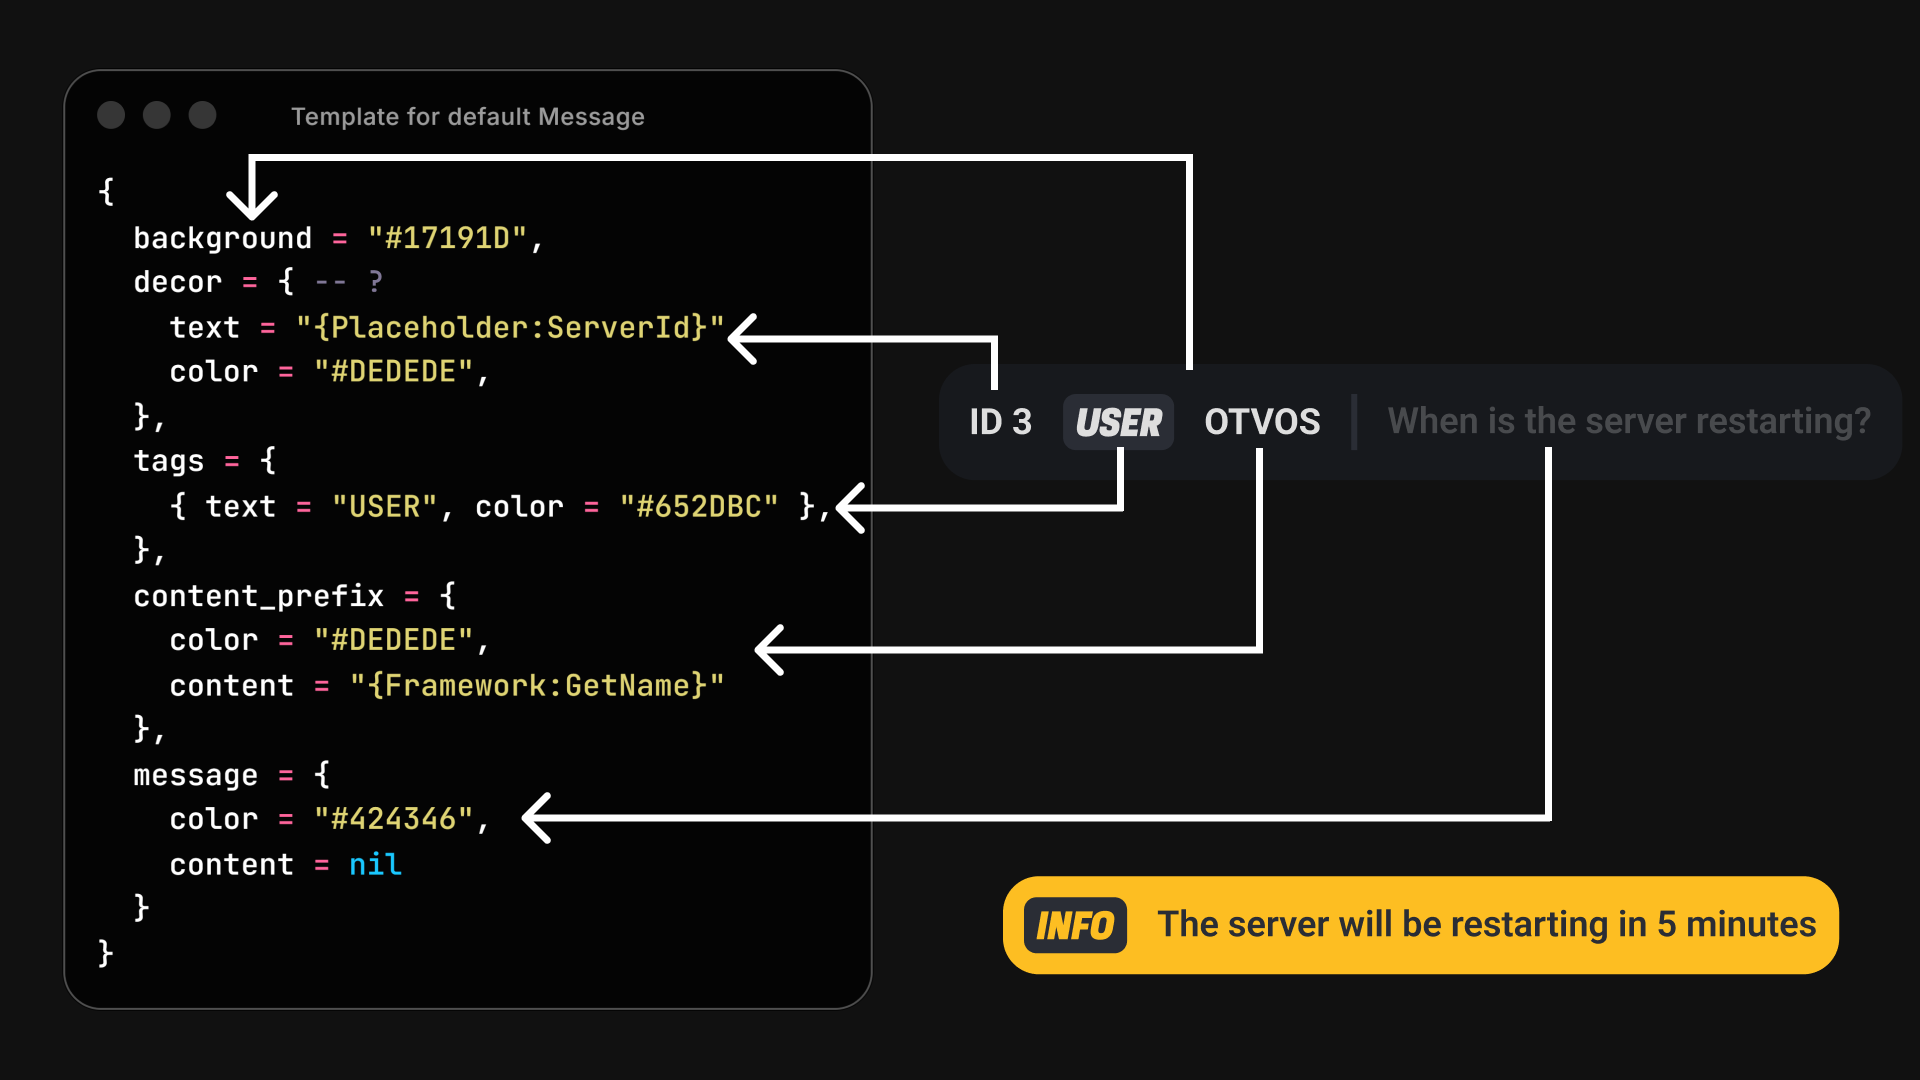
What fields are used to render a message?
#
1. Adding a template inside the script
Head to of_chat/templates.lua. Then you'll see something like this:
-- Example template
addTemplate("example", {
  decor = {
    color = "#ffff", -- Default color: theme.brand
    text = "{Placeholder:ServerId}"
  },
  tags = {
    { color = "#ffff", text = "{cmd:name}" }, -- Default color: theme.brand
  },
  content_prefix = {
    content = "",
    color = "#ffff", -- Default color: theme.brand
  },
  message = {
    color = "#fff", -- Default color: theme.secondary
    content = nil
  }
})

-- OOC template
addTemplate("ooc", {
  tags = {
    { text = "OOC" }, -- Default color: theme.brand
  },
  content_prefix = {
    content = "{Placeholder:CfxName}",
  },
  message = {
    content = "{Self:GetArgs}"
  }
})
--- ...
Here is were magic happen. You can add your own custom templates which will be then used by commands/chat messages.
You might be confused about things like {Placeholder:CfxName} or {Self:GetArgs}. This is what we call "placeholders",
identifiers that will be replaced during runtime with data. Please refer to the corresponding page for more information regarding placeholders.
As you might have noticed, the fields that compose the template are based on the image above.
Almost all fields are optional and if not provided they will default to the theme colors (set by the user in settings).
Empty messages
message.content = "my_message_string"
If not provided we'll drop your message before it reaches the next step.
Syntax errors
If the module (templates.lua) has syntax/runtime errors we'll drop it's contents and default to an internal template.
You'll get errors warning that we'll be defaulting to this template (templates added through third-party scripts will still work).
#
2. Using an export
You can also use exports to add templates on runtime. This is useful when you want to build custom message layouts depending on some external states.
Even though it's still possible to mess with the layout through the buildText handler in custom-commands, it's encouraged to add custom templates and of course, totally needed for non built-in commands.
#
In this example, we'll be explaning the following exports:
  export("chat.getTemplate", getTemplate)
  export("chat.addTemplate", addTemplate)
local template = exports.chat:getTemplate("my_template_name")
if template then
-- We got a valid template, let's use it
-- First argument is used as message.content payload
exports.chat:addMessage("This is a test message with a fancy template", template)
-- Or... you may wan't to register a built-in command (You can find more information in the corresponding page)
exports.chat:addCustomCommand({
name = "salute",
colors = template,
nativeCommand = {
enabled = true,
data = {
help = "This command does cool stuff",
params = {
{ name = "id", help = "Server id of the person" }
}
}
},
flags = {},
checks = {},
recipients = {
{ type = "visibility", payload = { range = 15.0 } },
},
buildText = function(message, args) -- this is run in the build-text step (see all C/S steps in the command page)
local target = #args >= 1 and args[1] -- args is always a valid array
if target and tonumber(target) then
message.message.content = string.format("%s says hi to %s", "{Placeholder:ServerId}", target)
end
return message
end,
ttl = nil -- nil: persistent, number: time-to-live ms
})
else print("This template doesn't exist", json.encode(template)) endexports.chat:addTemplate("example", {
decor = {
color = "#ffff", -- Default color: theme.brand
text = "{Placeholder:ServerId}"
},
tags = {
{ color = "#ffff", text = "{Framework:GetNameMasked}" }, -- Default color: theme.brand
},
content_prefix = {
content = "",
color = "#ffff", -- Default color: theme.brand
},
message = {
color = "#fff", -- Default color: theme.secondary
content = nil
}
})Coding skills required
Please note that you must have so basic knowledge on how lua syntax work, functions and variables among other things.
If you don't manage to understand how this works, use the built-in command tool or hire a developer.